Wednesday, January 30, 2013

Wishful Thinking FOTD

So as many of my readers know, my daughter and I have been sick, therefor absent, for a few days in effort to recuperate. We still aren't at 100% over here health wise, but after my shower tonight I felt up to doing a little something for you.
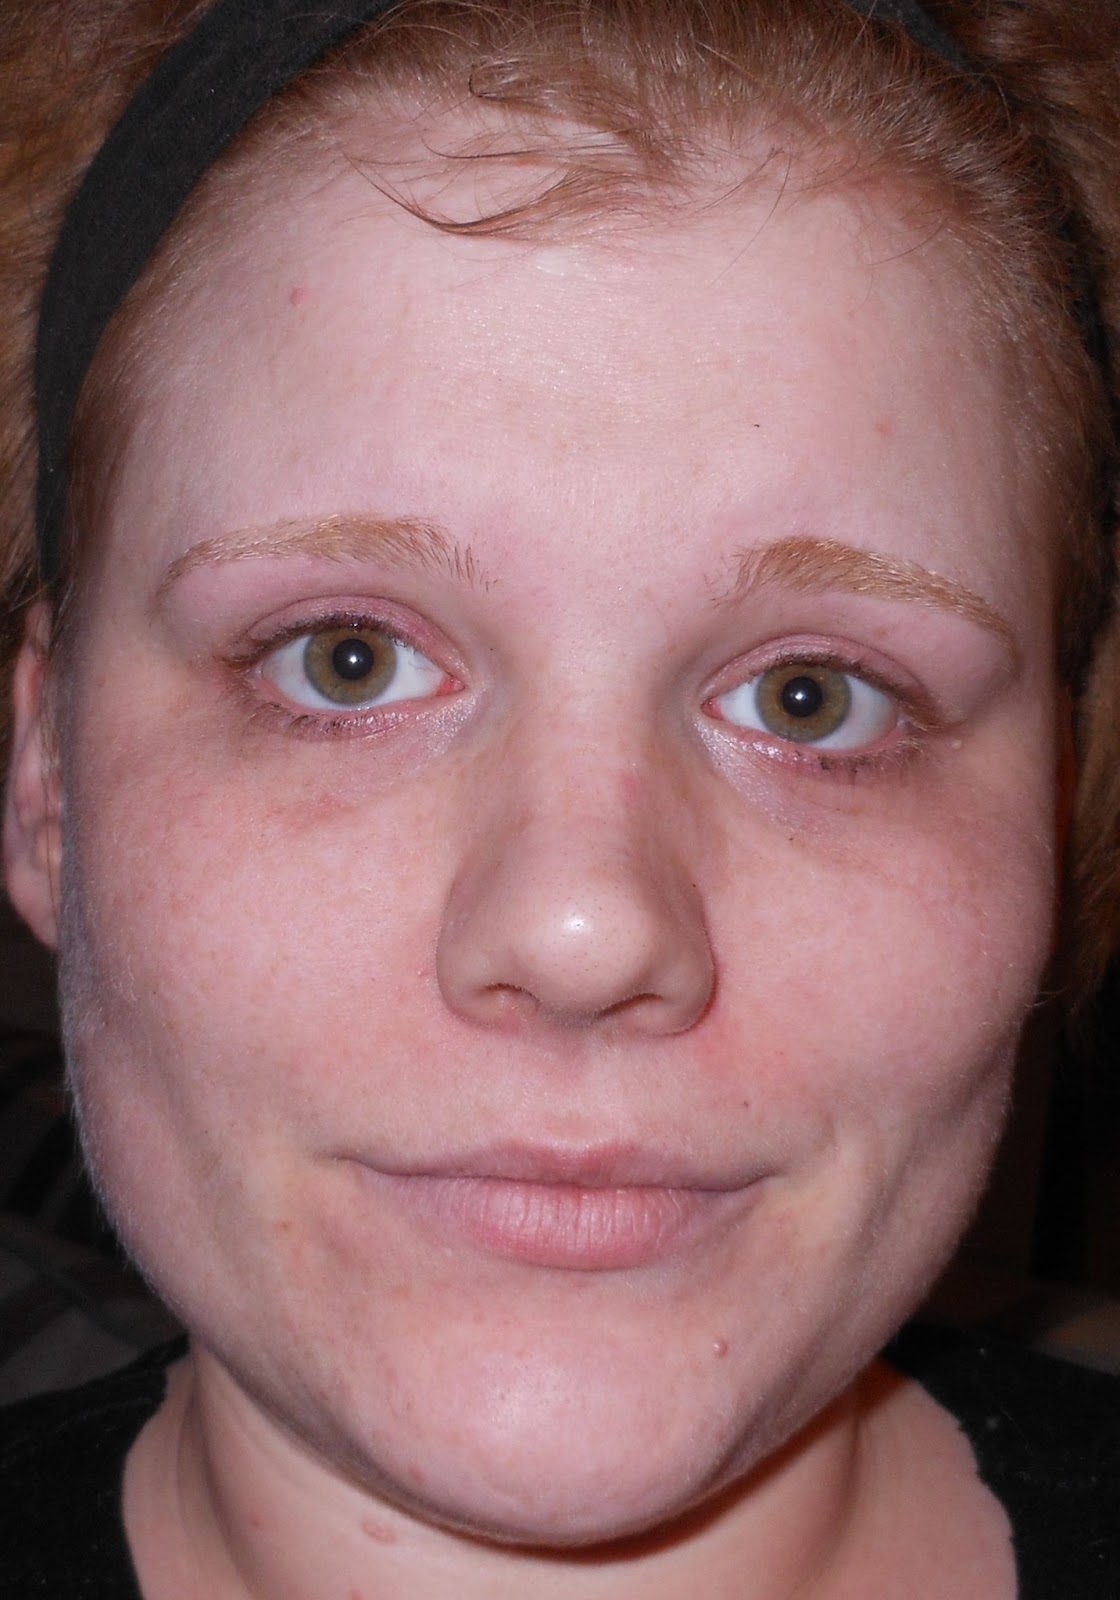
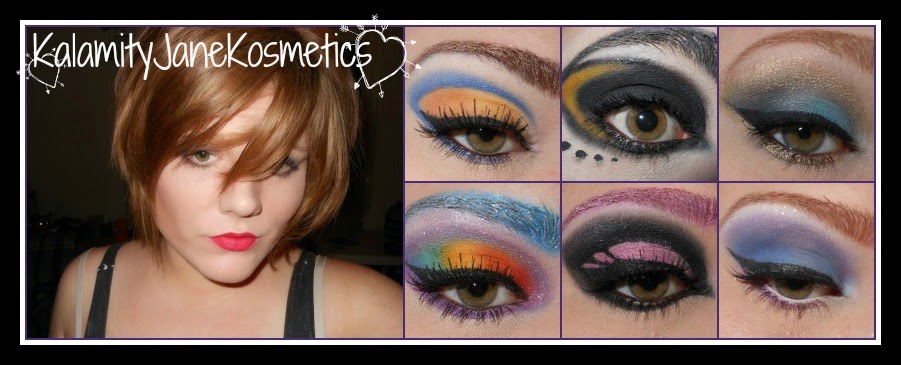
The weather here in Michigan went totally crazy yesterday and we went from 12 degree crazy blizzard weather to 60 degree super awesome thunderstorms today. It's totally insane and it has everyone, including myself, wistfully thinking of spring. So in the spirit of spring, I decided to do a pretty look to remind me of the season I love. A list of the products I used will be at the end of the post.
When creating this look I was really looking to capture the softer more delicate colors of spring which makes this a very wearable look. And being that the great and mighty beauty gods at Pantone said the color of the year is emerald green, I figured it fit my theme well and should most definitely have a place in this look. And I would just like to say that I am very pleased with emerald green being the color of the year and can't wait until the Sephora+Pantone Universe color of the year palettes come out. I haven't heard anything on it yet, but my ears and eyes are open.

Disclaimer: I purchased this product with my own funds, I am not being paid or compensated by the company in question. My opinions are entirely my own.


Face Products: Sephora Collection Perfecting Ultra-Smoothing Primer - $15 USD; Maybelline Shine Free Oil Control Makeup in Ivory - this is no longer on the market, but it's my foundation in the pic, sry; Bella Bamba by Benefit Cosmetics - $28 USD; Clinique True Bronze Pressed Powder Bronzer in Sunkissed - $25 USD (I got mine in one of their deluxe sample palettes that they give away when you apply for a credit card..); Mary Kay Mineral Powder Foundation in Ivory 2 - $18 USD.
Eye Products: e.l.f. Essentials Eyelid Primer in Sheer - $1 USD  Pink. light pink, and purple shimmer eye shadows from the Sephora Collection Color Daze Blockbuster makeup palette - $49.50 USD, though it is no longer available; The emerald green cream eye liner is also from the Sephora Color Daze palette, Sephora Collection Full Action Extreme Effect Mascara in Black - $15 USD; e.l.f. Essentials Eye Widener in White - $1 USD; and a Neutral Brown from the Sephora Color Daze palette to fill the brows.
Lip Products: e.l.f. Essentials Lip Stain in Nude Nectar - $2 USD topped with NYC New York Color Liquid Lipshine in Nude York City - $2.49 USD

And pictures of the products. I forgot to include the lip colors in these pics, so if you want to see them you'll have to check the links above.
Eye Colors Used
The shadow I used in my brows
 I hope you like this look, I really do. It's something I could see myself actually wearing. I don't generally wear heavy makeup when I go out, so I definitely favor the softer colors. Feel free to drop a comment below, I read all my comments and do my best to reply to them all. And if you like what you saw here, please subscribe and don't forget to Like KalamityJane on Facebook. Til next time!

Friday, January 25, 2013

Just Rambling

Thought I would let you guys know that I'm probably going to be out of commission for the next couple/few days as I, my daughter, and my husband have all come down with some sort of awful head cold. It's really pretty miserable, not gonna lie. So sorry if you're looking forward to awesomeness, because I won't be delivering.
But I figured I'd do one quick little bit of randomness before this cold has me laid out with peppermint tea and soup.
This is my lovely daughter, Penny Lane, she is 2 years old and this is her first time really playing in the snow. I do live in Michigan, which generally has quite a bit of snow in the winter but this past week was the first time that we really got dumped on this year. And being that last year she had only just started walking right around winter, this is her first real fun in the snow and I thought the world should know. Because my kid is awesome. Yeah.
I know this post was totally random, but it just felt like the thing to do and being that this is my blog, I did it.
Hopefully I will be chattering away at you guys again soon, but for now I have a sick family to heal. Til next time!

Wednesday, January 23, 2013

EBOOST - Pink Lemonade Flavor

Alrighty, this post is way delayed, but I have just a quick review from another one of my items from my 2012 Holiday VoxBox from Influenster. Drumroll..... EBOOST in Pink Lemonade Flavor!!!

Disclaimer: I received this item complimentary for testing purposes from Influenster. All opinions are entirely my own, no one is paying for them.

I'm going to keep this one short and sweet, as it's not my usual beauty stuffs. Let's start with a quick description. EBOOST is a natural energy booster (just in case you couldn't tell by the packaging...) as well as being low calorie. Yay! This product uses a small amount of caffeine supplemented by generous quantities of vitamins to naturally boost your energy. And it's sweetened with Stevia, so no artificial sweeteners involved here, big boost for the product. It also comes in an easy to mix powder (similar to Crystal Light) or in shots, though they are more expensive. It's $28 USD for a box of 20 powders or $39 USD for a box of 12 shots.
The sample that I received was Pink Lemonade flavor, though they also have Super Berry, Orange, and Acai Pomegranate. The Pink Lemonade flavor was a little disappointing to be honest. It was a little bland and quite sweet, whereas I prefer a more tart lemonade flavor. But that's just me, a lot of people really prefer their lemonade sweet. And I would really like to try the Acai Pomegranate as it's a flavor I tend to favor in these types of drinks.
And the big question, does it work? Yes it does. It doesn't make you like super charged crazy like an energy drink, and there are no jitters to accompany it, I just felt awake. Awake for quite a long while, haha. And there really was no come down or crash or anything, it was a very natural transition. So yay for doing what the packaging says!
Overall, I think this is a good product, though again, I was a little bummed by the sweetness of the lemonade. I'll probably try some of the other flavors to see how I feel about them.
Hope you enjoyed my quick review, and I'd love to hear about your personal experiences with this product. Don't forget to subscribe or Like KalamityJane on Facebook. Til next time!

DIY Egg Mask

On my request post from last week (you can find it here, I really do want your input on this post ladies!!!) one of my lovely readers requested I do a DIY egg mask. And being that I love my regular readers, I decided to oblige.
Egg masks are great for people who have large easily clogged pores and normal to oily skin. I do have rather large pores that do end up clogged more often than not. However I also have very dry skin, especially in the winter months. So this mask isn't really the best fit for my skin type. I do plan on doing another DIY mask in the near future for those of us with dry skin, probably a honey mask. But moving on...
Okay, for this mask you only need an egg, 2 bowls, and a fork/whisk. Oh, and a clean face.
Not a great skin day for me. :(
Make sure your face is thoroughly cleansed, you don't want any makeup getting trapped under the mask!
Next you're going to want to separate the egg whites from the yolk. To do this, just carefully crack the egg and when you're opening the shell make sure the entire yolk is in one half and let the white run down into one of your bowls. Then transfer the yolk to the other half of the egg shell letting the remaining whites run into the bowl. Keep doing this until all the egg whites are in the first bowl and then put the yolk into the second bowl.
Now take your fork/whisk and beat the egg whites until they're really frothy. You want to see a lot of bubbles in these egg whites!
Now take the foamy bubbles in the egg whites and apply them generously all over your face avoiding the eyes.
If I look miserable, it's because there's egg all over my face.. And yes, having egg on my face does gross me out a little, haha. Anywho, you want to leave the egg whites on your face until they're dry and hardened. You'll know it's done setting when you can't smile anymore.
Now rinse!
For the next step, you're going to start by breaking open your egg yolk.
Now take the runny inside of the yolk and apply it all over your face, again avoiding the eye area. And for those who may be wondering, the yolk has some natural moisturizers that leave your skin quite supple.
And again, you're going to want to wait for the egg to dry, use the smile test if you're unsure as to whether or not it's dry. And after the yolk is dry, rinse it off. You'll probably need a washcloth to get all the egg off.
And now you're done!!! While this isn't the best mask for my skin type, it still does improve the overall look of my skin. And as for it's deep cleaning pore minimizing capabilities, the proof is in the pudding.
before
after
I decided to use a close up of my nose as it's where my pores are the most unfortunate. And while my pores aren't totally clear, it's significantly better. And being that a dozen eggs costs about $1.50, and you only use 1 egg for this mask, the cost comes to about 12 cents a mask. And those results are totally worth 12 cents!
Hope you liked my very first DIY mask, I enjoyed doing it! And being that this was so fun and so cost efficient, I plan on doing many more of these DIY masks. Yay healthy skin! Feel free to drop a comment below and let me know what you think, I love hearing feedback from you guys. Also, don't forget to subscribe or Like KalamityJane on Facebook! Til next time!


Tuesday, January 22, 2013

e.l.f. Essentials Brightening Eye Color in Ocean Dreams

Today's post is the last of my leftover stocking stuffer reviews! Took me long enough, right? And for my last holiday related post: e.l.f. Essentials Brightening Eye Color in Ocean Dreams. I've reviewed a couple other of the e.l.f. Essential Brightening Eye Colors in Punk Funk and Day 2 Night, so I was very curious to see how this one would turn out. All of the e.l.f. Essential Brightening Eye Colors sell for $1 USD, and there are 12 different quads to choose from, which is pretty awesome. Let's get started then, shall we?

Disclaimer: I purchased this product with my own funds, I am not being paid or compensated by the company in question. My opinions are entirely my own.

e.l.f. Essentials Brightening Eye Color in Ocean Dreams
This is pretty standard e.l.f. packaging, it feels cheap but not like it will break open on you if you have it in your purse. Couldn't ask for much more for a dollar.
This quad comes with four lovely blue shades, all of which are shimmery but to different extremes. And honestly, I really think Ocean Dreams is a great name for this quad. It's hard to tell in the photo, but the lightest blue is super shimmery, borderline glittery, the 2 darker blues are just shimmery, and the 2nd lightest blue has a more satin, less shimmery finish.
I was a little let down with the swatches, not gonna lie. The colors seemed just kind of flat. And the lightest blue does shed sparkles like crazy. One other little bummer, the colors are soft enough in the pan that you do end up losing some of the product. Not a lot, but definitely more than I'd like to see.
On the upside, the colors blend exquisitely. They really work together well. And the darkest blue has a touch of purple in it, which keeps the colors from being too similar.
So as bummed as I was with the swatches, the colors are gorgeous on the eye, which is really all that matters. I used the lightest blue on the inner corner of my eye, the shade darker over the rest of the lid, the next shade darker through the crease stopping before the inner eye, and the darkest shade through the outer corner.
I love that the lightest shade is so sparkly; it brightens up the entire eye. And wow are the colors complimentary of each other. I love the look. Really, truly, love it.
This was a fabulous buy on my part. The colors work well with each other and blend very well. It doesn't look like it cost a dollar. And just so you know, it is incredibly easy to work with. But do remember to tap your brushes or you'll end up with blue all over your face, haha.
So overall, this is a great product. I got my dollar's worth and then some with this one. It blends easily, the colors are vibrant and beautiful, and the price is most definitely right.
Would I recommend this product? You bet I would. This is the best e.l.f. eyeshadow that I've tried yet. I love it.
Will I repurchase? Most definitely. It's a really great product.
So I hope you enjoyed the last of my e.l.f. stocking stuffer reviews, I did my best to end this on a high note. I know I had some pretty ragey reviews with some of this stuff, but I loved this one, I really did. As always, feel free to leave your feedback in the comments, I love hearing what you guys have to say. Til next time!


e.l.f. Essentials Lengthening & Defining Mascara

So today I have for you another one of my e.l.f. stocking stuffer reviews! This review is e.l.f. Essentials Lengthening & Defining Mascara in Black Brown. I was pretty excited to try this product as it is only $1 USD, and most mascara is at least 5x that expensive, so yay saving money!
 
Disclaimer: I purchased these products with my own personal funds, I am not being paid or compensated by the company in question. My opinions are totally my own.
 
So let's start this off with the packaging. Not much to say here, the logo and product name are clearly stated on the tube in silver lettering. That's about it. But for a dollar, I really don't expect much more.
And this is where things start going downhill. The wand. The design is simple, to put it lightly. There are huge grooves in it instead of lots of little bristles to help separate and define lashes. And if you can't tell, the product itself goops all up in the grooves and on the wand. And just so ya know, it does the same thing on your lashes. Goop goop goop goop goop.
The color is the only thing about this that is spot on. It is the perfect black brown color. Unfortunately, it applies inconsistently and again it goops all over the place! And if you can't see the inconsistency in the swatch, check out the real deal.
Notice here how some of the lashes are clumped together in nastiness whereas some of the lashes are barely coated? Yeah, mega fail on that one. And this was after 2 coats. Also there's no lengthening going on here. And the only defining is in the nasty clumpy bits.
I would also like to touch on the feel of the product; it's miserable. It seriously felt like I dipped my eye lashes in candle wax. I have never had a mascara that felt this gross. It felt heavier on my eyes than false lashes and when the product dried (which took quite some time) they felt like a Barbie doll's fingers; hard but still semi-pliable. Definitely not good.
Overall, I hate this mascara. The color is spot on and it does last a decent amount of time, though nothing extraordinary. But everything, and do seriously mean everything else about it absolutely sucks. I hated wearing it, I hate the way it looks, and taking it off was a pain in the butt too.
I wouldn't recommend this product to anyone and I will never repurchase. It's terrible. Don't buy it.
I hope that you enjoyed this review, or at least got a good piece of advice. Feel free to leave a comment below, subscribe or Like me on Facebook. Til next time!


Sunday, January 20, 2013

How to Shape Your Brows

Interest was shown, so I finally got around to doing a brow tutorial. This is gonna be a long one, so let's jump right in!
What you need: Tweezers, scissors, and a brow pencil.
Before we dive into the how-to bits, I figure you should probably get a look at where my brows are prior to shaping. I've been growing them out for weeks just for you guys, and it seriously drove me insane. But here they are:
To start, we need to trim the brows. To do this, use the brow brush to comb the brows upward and trim the ends that come above the top of the brow. If you have exceptionally long brows, you should also comb the brows down and trim below the brow as well.
The hairs above the black line need to be trimmed as they are above the natural brow line.
Now, to make sure we get nice even brows, we need to measure them to our face. The beginning of the brow should line up vertically with the nostril of the nose. Use a pencil or a makeup brush to ensure that your lines are nice and straight, and use a brow pencil to mark the line. Keeping the pencil on the nostril (this is your axis point for all of the measurements) rotate the brush so that it lines up with the outside of your pupil or iris (try to keep looking forward!) and put a mark on your brow as this is where the arch should be. And finally, rotate your pencil to the end of the eye, keeping your axis on your nose, and mark it. This is where your brow should end.
After your brows are all measured out, take a brow pencil and sketch and fill the desired shape of your brows. Make sure they match!
Now take your tweezers and remove any hairs that are outside of your desired shape. And just to clean up the look, brush your brows up again and trim anything above the brow.
Hope this was helpful! I'd love to hear back from you guys on this one, I do read all my comments. Til next time!


Tuesday, January 15, 2013

MAC Cosmetics Lip Pencil

Today for your reading pleasure, I am reviewing MAC Cosmetics Lip Pencil in Embrace Me. This product sells for $15 USD at MAC Cosmetics. Not gonna lie, I totally got this pencil to go under my Fuchsia lip glaze from e.l.f. If you want to check out the lip glaze (I do use it later in the review) click here. 

Disclaimer: I purchased these products with my own personal funds, I am not being paid or compensated by the company in question. My opinions are totally my own.

As always we start with the outer packaging. It's flat black cardboard with the MAC logo and the product name on the front with the pencil color displayed on one end of the box. The cardboard is, as I expect from MAC at this point, quite sturdy. This is actually something I quite like for a lip pencil simply because it is a pencil, and pencils aren't exactly difficult to break.
The pencil design is pretty standard, and comes with MAC's standard and simple color scheme. The lid is a nice solid plastic, so I'm not worried about breaking it, which is always a plus. But the real showstopper here is the pigment, not the pencil design, so let's move on.
The texture of this pencil is heavenly. It glides on without any caking or inconsistency that you sometimes see in lip pencils. It's not moisturizing or anything, it is a lip pencil after all, but it doesn't suck the moisture out of your lips either. And the color is phenomenal! It is highly pigmented, and long wearing which leads me to believe that this pencil will last me a long time. And it's a beautiful shade of fuchsia, a very vivid blue-pink. But you don't have to take my word for that, I have a picture.
This is just the lip pencil, no gloss, no lipstick, no lip primer. And it is gorgeous! I wore this color for quite a bit of time with no color loss. It did stain my lips a little, just a tiny bit though. I'm sure if you took the time to properly prime your lips or apply a concealer, there would be no staining, but the staining really just isn't bad enough for me to bother.
This is the finished lip with the lip pencil and my e.l.f fuchsia lip glaze over top. Personally, I love it. I think the color is fantastic, and my lips look healthy, not cakey. I am very very pleased.
So my overall opinion on this product? It's amazing. This is by far the best lip pencil I have ever used. $15 USD seems like a lot, but this pencil is going to last for quite some time and it's just so lovely. I am very happy with this purchase.
Would I recommend this product? Oh yeah. It's easy to work with, it's long wearing, and it doesn't dry out the lips.
Will I repurchase? Yes I will. I'll repurchase this color when it's running low, and I'll probably be buying some of the other colors as well. And, I forgot to mention this before, but there are 30 different colors available, so if pink's not your thing there's a slue of other shades to choose from.
I hope you enjoyed my review, and please please please drop a comment below! I love hearing from my readers and I really do want to know how you guys feel about my posts and what you would like to see me doing. And if you haven't yet, please subscribe. It makes me all happy and feels and stuff. Til next time!


MAC Cosmetics Eye Shadow X 2

Alright, so today for you lovelies I have another review! Today's showcase is MAC Cosmetics Eye Shadow X 2 in Dynamic Duo 3. This eye shadow duo sells for $27.50 USD. For those of you who read regularly, sorry that it took me so long to get this one out. Just been super busy lately.

Disclaimer: I purchased these products with my own personal funds, I am not being paid or compensated by the company in question. My opinions are totally my own.

And, as always, we're going to start with the packaging. The eye shadow duo came in a little flat black cardboard box with the MAC logo on front. It's a sturdy little box, not that that's seriously important, but it's a nice touch. The only thing I don't like about the outer packaging is that the specific product name isn't directly on the packaging. There's a little sticker on top that says Dynamic Duo 3. Nowhere on here does it say what colors are in the duo or any other description. Granted, you generally know what you're buying, but if it were a gift, it would be nice to have some idea of what you're opening before you actually do.
The actual product packaging is black plastic with a clear plastic lid which has the MAC logo on it. I like this design simply because I like being able to see what colors I'm looking for. I don't like rifling through my makeup cases and having to open products to see what's inside. And this is nice clear plastic, not the shoddy kind that looks foggy or off colored.
And the packaging is really sturdy. It doesn't have a clasp, and I'm pretty sure that there's no magnet involved, but it stays closed. It has an odd looking hinge which I am pretty sure is responsible for keeping it closed tight. And for the record, I have dropped this on my bathroom floor and the plastic didn't break or chip or even scuff, and the lid stayed on tight. Very nice! Sleek, simple, and functional.
The product itself comes in two separate pans about an inch in diameter. The Dynamic Duo 3 comes with Pearled Earth and Teal. Pearled Earth is described by MAC as a "dirty-toned purple" that "adds contrast with a sparkling touch of frost." Teal is simply a matte teal-blue.
I applied these swatches with the top half on primer, the bottom half on bare skin. There is hardly a change in the pigmentation and vividness of the colors, which I think is wonderful. The colors apply easily and are quite creamy for a powder. There is almost no color fallout if you remember to tap your brush before you apply. And the colors are soft, but not chalky so you don't end up wasting a lot of product.
These colors blend beautifully and are super easy to work with. I said in my initial haul post that I favored the purple, but I'm not so sure now. They are both just absolutely gorgeous and so different that picking a favorite is just too difficult. It's like apples and oranges.
I used Pearled Earth on my eyelid and Teal through the crease with a matte white eye shadow on the brow and the inner corner of my eye. As you can see, there's no fallout color under my eyes which is pretty rare for any blue based color.
My overall impression of this product: I love this duo!!! The colors are beautiful and compliment each other well, they are highly pigmented, they're long wearing, there's no color fallout, and they blend with ease. Bloody brilliant!
Would I recommend this product? Hecks yeah. This is a great product, truly great. I think that anyone could work with these colors and have an enjoyable experience.
Will I repurchase? Most definitely. This was a great first experience with MAC's eye shadows, and I hope to be the proud owner of many many more of their shadows.
This product is a little on the pricey side, but when you take into consideration that their single eye shadows sell for $15 USD a piece or they have their Custom Palette Eye Shadow X 2 for $33 USD, so it's really a pretty good deal.
I love this product (if you can't tell...) and I hope you liked my review. Please feel free to comment below or subscribe, I love me some feedback! Til next time!


Random Update - Schedules, DIY, Q&A

Okay, so I know I haven't posted anything in a while, and I'm sorry. It has been super hectic over here and I have been needed elsewhere. I don't know when my schedule is going to balance out, but I'm going to try and post stuff as much as possible.
Random funs, the lip color is Viva Glam Nicki if you're curious.
I do have some ideas brewing in my head about what direction I want this blog to go, and I would love to get your input on it. You guys are the audience, after all.
For starters, I want to have a set schedule for my postings. Like Monday could be a FOTD, Wednesday an eye tutorial, DIY Fridays. Something of that nature. Is this something that you think would be cool? And if it is, let me know how often you would like to see me post things, and let me know the stuff that interests you the most so that I can schedule accordingly.
Secondly, I want your input! What do you guys want to see me putting up here? I was thinking of doing DIY stuff like homemade masks, facials, and what not. Is that something that you guys would like to see? Do you prefer tutorials or product reviews? I really want to more actively engage my readers. So like me on Facebook or Twitter, and let me know what it is that you want! You can also drop comments on any of my posts as to what you'd like to see me doing. Even if it's stuff about the layout of my blog or my writing style, I want to know what you think so that I can make this blog totally rock.
I would also really like to do a Q&A type thing maybe once a month, depending on how many questions I receive. I would prefer the questions to be posted to my Facebook, and they can be about anything; Makeup tips, what kind of brushes I use, personal stuff, my stance on gay marriage and the Death Star, whatever you want to know! And then I'll talk all your questions and answer them here. I think it could be way fun, and would love for that to work out. If you all think it's stupid, feel free to tell me. No point in a Q&A if there are no Q's.
I was also thinking it could be fun to do makeovers of friends, family, or readers in the area. It just seems that if I'm doing makeup tutorials, I should probably do some that would apply to people that don't look just like me. Again, if you're interested in this, let me know.
That pretty well sums it up, I think at this point this seriously goes without saying, but... As always, feel free to comment below! And if you subscribe you'll make my day. But please, let me know how you feel about the changes I'd like to make to the blog, and if you have other random ideas TELL ME!!!! Hope to hear from you guys soon!!! Til next time!

Wednesday, January 9, 2013

e.l.f. Essentials Duo Cream Eyeshadow

Today I have another e.l.f. review for you guys, and just so ya know it's gonna be a little harsh. This product is e.l.f. Essentials Duo Eyeshadow Cream in Berry Mix.

Disclaimer: I purchased these products with my own personal funds, I am not being paid or compensated by the company in question. My opinions are totally my own.

This product was pretty immediately disappointing for me. I ordered it online for $1 USD and I thought it was going to be really pretty. In the picture on e.l.f.'s web page, the 2 colors are a very pretty, very vivid berry and a lovely, shimmery mother-of-pearl shadow with a hint of lavender. I didn't expect the colors to be like, the best thing ever, but I really didn't expect this.
The colors I received are ruddy neutrals that just really aren't that appealing. And I did go and double check with the website, and this^ is not the colors they claim to be selling. I also browsed through the other colors thinking that maybe this was a different duo they had and the packaging got mixed up somehow. Not the case. They don't claim to be selling anything that looks like this.
But moving on. The packaging is cheap, and I mean really cheap. It has a screw on lid, but it's really loose and does make me wonder as to whether or not it will stay on if I have to take it with me in a tote or whatever to travel. On the upside the two shadows are separated properly in their pans, they aren't bleeding into each other at all.
And swatches! The product is very creamy and light. I applied these over primer and used 2 coats. The color is rather blah though. Can anyone tell me what kind of berries these are supposed to remind me of, because I am at a loss.
And the product still manages to get worse! I applied the light color on my eyelid, working the darker color through the crease and the outer corner of the eye, and they just kinda melted together. Like at first it wasn't bad, but after wearing the shadow for 20 minutes or so they just ran together. Toward the inner corner of my eye a little of the lighter color stayed and added a bit of shimmer. That was it.
Also, when I applied my pencil liner, it like wouldn't stick to the shadow and just kind of went away. In that picture, I seriously applied my eye liner 3 times to achieve a very minimal effect.
And to top it off, this product creases really bad. Even with primer. 
My overall opinion: This is a terrible product. Would I recommend it? No. Never. Not to anybody. Will I repurchase? No. It's a mess. The colors smear and smudge, they don't last, they crease terribly, and they aren't even the proper color!!! You can check their website, what I received was so not what they were claiming to provide. This product was a serious let down and I will probably never use it again.
If you have tried this product and had great results, let me know. There's always the chance that I got a bunk product. But as of right now, this is probably the worst product I've ever owned. As always, feel free to comment below or subscribe. Til next time!